I thought that I’d talk a bit about how I work and the steps involved in BIY from field to skein – so that if you ever pick up a skein you know just what has gone into it.

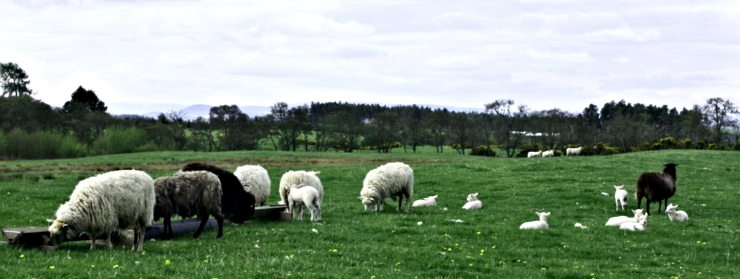
The first stage is to make contact and build a relationship with a farm or smallholding that has a sheep breed I am interested in, and whose land managament and animal welfare meets a high standard. I’m now working with around 12 local farms and have found them in a variety of ways. My very first contact (in late 2015 in advance of summer 2016’s clip) was Fearniewell Croft, a local smallholding which operates mostly as an organic veg grower – and since I buy my delicious veg box from Dan and Rachel it made sense to contact them and ask if they would be interested in me buying fleeces from their small Gotland(ish) flock. The next fleeces came from Jim and Linda’s Hedgefield Zwartbles – Jim had done some work with my husband, and Jim and I then realised we had been forestry colleagues in Aberdeenshire in the 1990s. Since then contacts have been made through active searching (such as finding Meadows Flock for my first Shetland fleeces) and word of mouth, with farmers contacting me to see if I’d be interested in buying their wool. Perhaps my favourite find is Coulmore – my friend Emily bumped into this special organic cheviot flock when she was out on a bike ride!
Over the next few weeks I’ll be contacting each of the farms to get a feel for when they’re likely to be clipping and I’ll then maintain contact until shearing actually happens – in an ideal world I’d visit on shearing day but this often turns out to be quite tricky. Clipping dates are often decided at the last moment, worked around weather and other farm and work duties, and as I have to work around my family and access to our car it often isn’t possible to visit until afterwards.
When I visit each farm I’ll have in mind the numbers and colours (if theyr’e Shetland) of fleeces I’m aiming to select. But if there’s lots of great quality that number tends to slip upwards, and likewise I won’t buy fleeces which aren’t good enough quality. I tend to do a bit of skirting at that stage – I can’t help pulling off daggy and coarse bits as I’m handling a fleece (ingrained, I think, from rolling fleeces as a child!) – but each fleece will be properly skirted back at home. Ideally I’ll do it the same day but often I don’t manage and then I’ll have a mammoth sorting session and clean-up several lots at once. Once they’re skirted I’ll weigh the fleeces so that I have a running total of each breed and colour. I really ought to build myself a sorting table, at the moment I crawl around on the ground in our back garden, or occasionally at the front – which I suspect must bemuse (and amuse) some of my neighbours! Discarded fleece goes around my soft fruit as a mulch and fertiliser, and any excess goes off to a local orchard for a similar end use.
Having selected, bought and sorted each batch of fleeces they’ll head off to the mill. Fleeces that go to The Border Mill will have a pre-booked slot (I have several booked per year) and I’ll take a car-load of fleece when I go to visit family in East Lothian, which is just a short drive from Duns where TBM is based. To date the other mill I have used is The Natural Fibre Company in Cornwall so it is more efficient environmentally for fleeces to be sent to them by courier service. I work closely with the mills to work out a spin plan for each batch – I’ll have my own thoughts but it is always good to make the most of their expertise and advice.
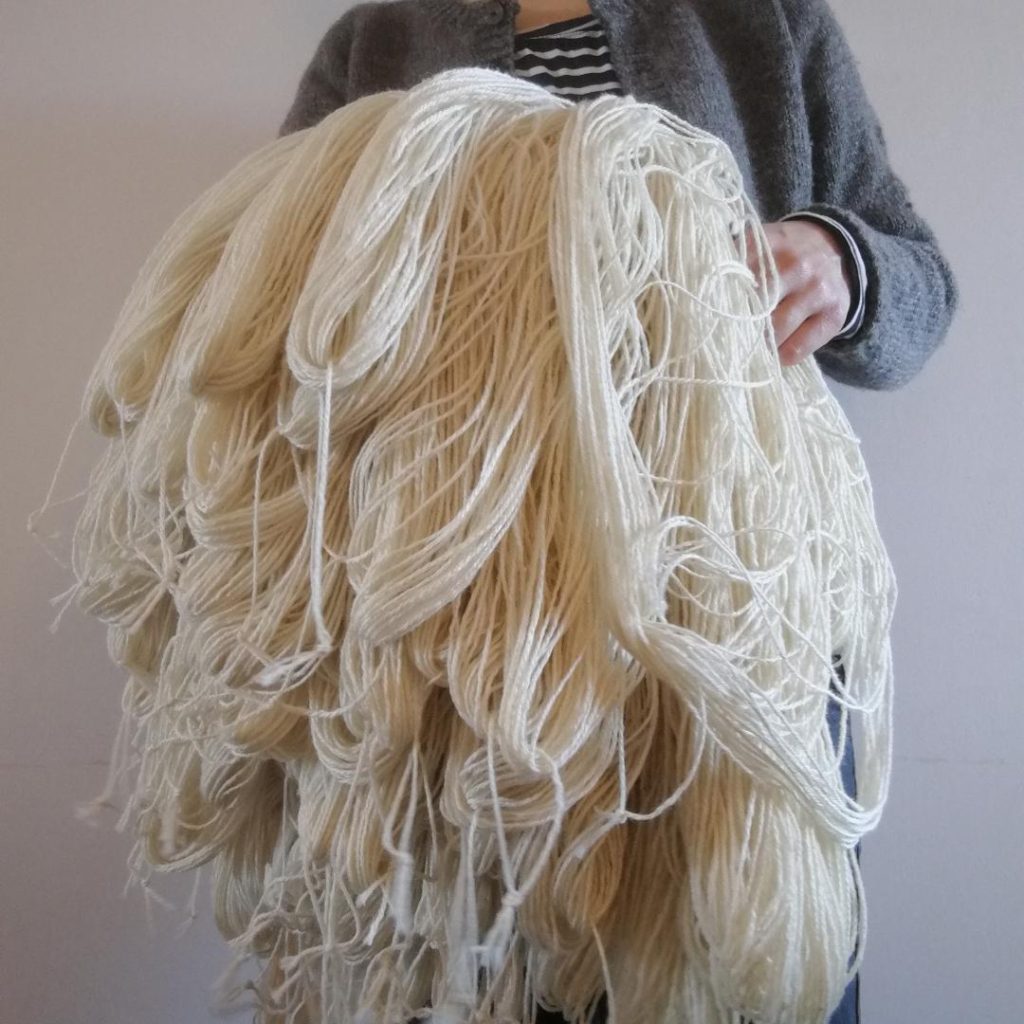
The spun yarn comes back to me on cones and the first step is to skein the yarn – I place the cone on electronic scales while I hand wind onto my skein winder. I’m much faster now than I was initially but it is still time consuming! At this stage an undyed skein just needs the appropriate label filling in from my online template, then printing off, cutting to size and attaching round the twisted skein. I always include the sheep breed, farm(s) the fleece came from, and clipping year – as well as m/100g – on the label.
After winding, a dyed skein goes through several stages. The first step is to thoroughly scour the skeins to clean them. I’ll scour several at a time by bringing them up to 70-80 degrees for an hour or so in tap water with a little pH netural dishwashing soap. If they’re to be dyed with indigo or a dye material which is ‘substantive’ (i.e. a dye that is applied directly without a mordant) they’re now ready to be dyed after being rinsed. As an example I don’t mordant if I’m dyeing with gallnut. Often though the next step is to mordant the skeins (with a naturally occuring salt – ‘alum’ or potassium aluminium sulphate dodecahydrate) which helps fix the dye to the fibre and increases light, water and wash fastness.
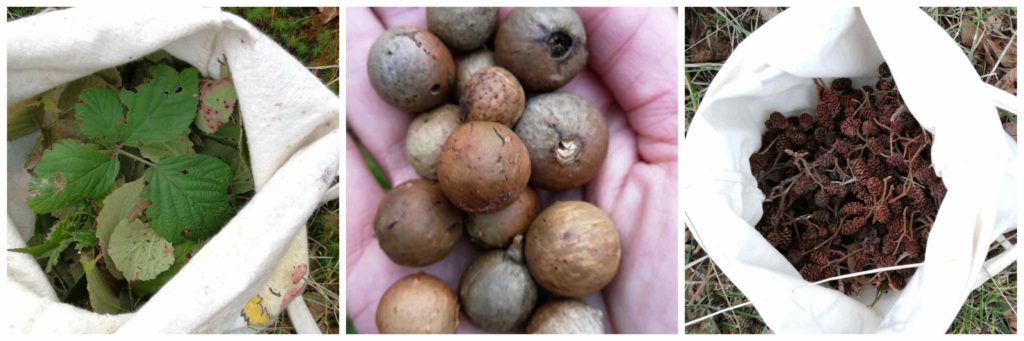
I like to collect as much dye material locally as I can and this includes bramble leaves, heather tops, fallen tree lichen, alder cones and beech mast (and this year I want to try hawthorn twigs and leaves amongst others). Unfortunately though I’d struggle to get a good range of colour without the addition of bought dye material which I buy from respected traceable sources. The exact dye process varies dependent on the dye material but usually involves heat and then soaking for at least several hours. Often I’ll overdye to create more complex shades or add more than one dye material at a time – and if I’m experimanting I’ll keep adding until I’m happy (or otherwise!) with the shade I have achieved.
The final step, after several rinses and air drying, is to twist and label each skein………although for a 4 ply yarn I will reskein each of the skeins, once they are dry, before twisting and labelling. This is my least favourite step as it is time consuming and fiddly, but I find that 4ply can get quite tangled during dyeing and I’d much rather it got to you without any tangles.
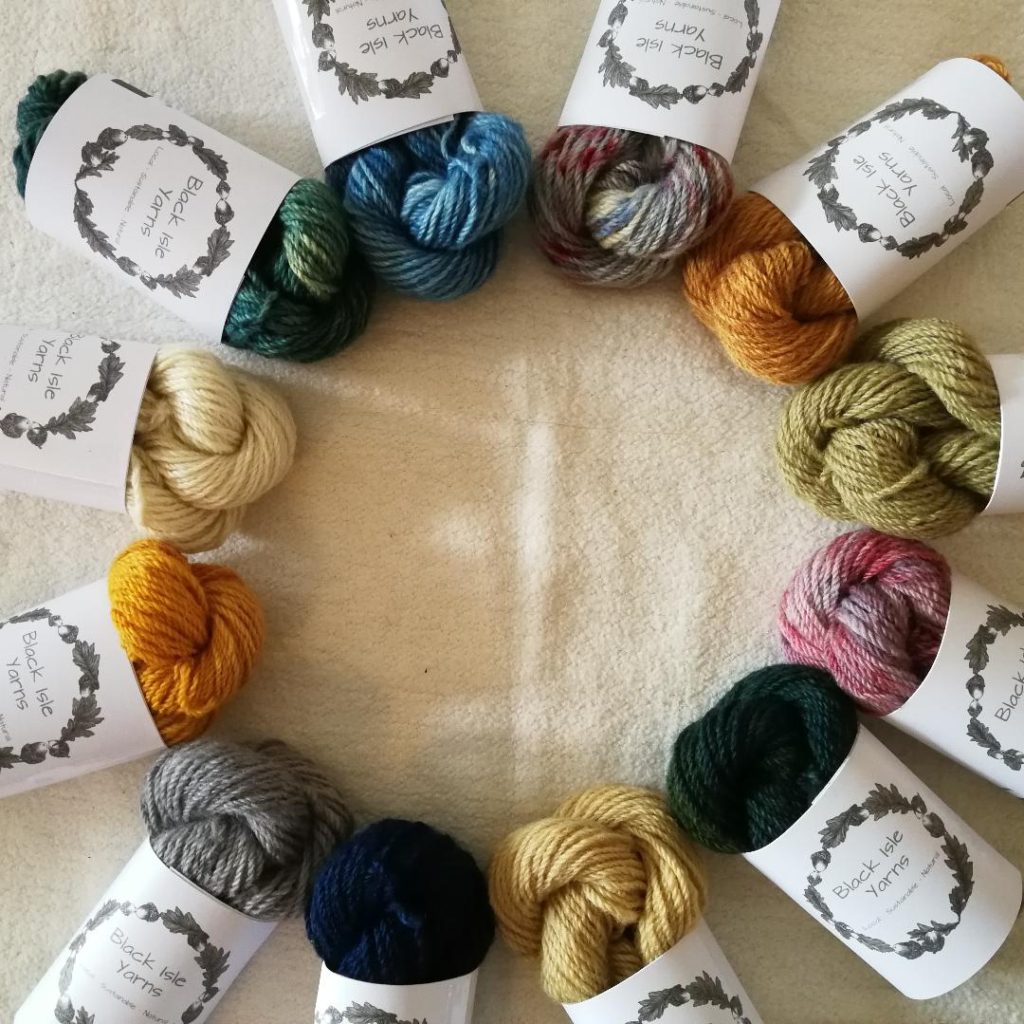
For yarn that I list online there’s a a final few steps – photographing, editing (to ensure the colour is accurate) and listing each shade and yarn into the shop database.
And there you have it! I hope that was an interesting insight into what I get up to and what makes each skein of BIY. If you have any questions please do ask.